Tag: rhinestones

SEWING

How to start making your own clothes?

Everyone can start making their own clothes!

If you have never held a needle and thread yourself, it indeed seems like a “mission impossible”. But believe me; I speak from experience, making clothes yourself is certainly not impossible. Before my mother died of cancer a while ago I never once sewed anything. My mother was a seamstress and made clothes for other people. It was easy for her to put in a hem, to make a dress or replace a zipper. And then suddenly I was no longer there and  I knew nothing about sewing. But with a little help and the right tools, I have made good progress. In this and following blog posts I want to share my experiences with you. What I think is important is that you have the right sewing supplies to start with.


What do I need to start sewing my own clothes?
Ingrid
Glitterdesign
  • Good scissors:
    • A good pair of fabric scissors: you should choose one with long “blades” so that you can cut through the fabric with long, smooth movements. The length of the leaf can vary between 20 and 30 cm. The scissors must lie well in your hand. So it’s best to ask the store to be able to test them. There are also scissors with curved blades that are great for cutting textiles because the fabric can then stay flat. It is best to choose a scissor of very good quality that can also be sharpened later. And that way can last a lifetime. These scissors may only be used to cut fabric. If you use them for paper, they will become blunt!
  • Paper scissors: use these scissors to cut pattern pieces
  • Small sewing scissors: is useful for cutting threads or giving small cuts to your sewing
  • Knurled scissors (optional): these scissors are just as large as a dust scissors but with a blade that has a zigzag pattern. It is used to finish seams of certain fabrics so that they do not fray and to make a decorative border. You can also cut textile that unravels quickly
  • Pins: come in different sizes. Preferably use stainless steel pins of at least 3 cm long. The best pins are long, thin, sharp and of good quality so as not to damage the fabrics
  • Needles: are available in various lengths and thicknesses. The higher the number, the finer the needle. It is best to buy a standard assortment box to get started. Also don’t forget to purchase a basting needle. This one has a large eye and a blunt tip and is used to baste 2 pieces of clothing together (or three as I heard my mother and grandmother say)
Tornmesje
  • Seam ripper: is indispensable for loosening stitching. It has a forked end. There is a sharp edge between the teeth of the fork that acts as a knife. The seam ripper is also used to cut open buttonholes without damaging the fabric. Cam knives come in varying degrees, suitable for seams in light and heavier fabrics
  • Thimble: to protect the finger when sewing (optional)
  • Thread: to be used with the thread


  • Yarn: cannot of course be missing as one of the necessary sewing accessories. Use the same color as the fabric to the extent possible. If this is not available, it is best to use a shade that is darker. For fabrics with a motif, rhombus or stripe, choose a thread color that matches the most striking color of the fabric. The type of yarn that we choose depends on the fabric to be stitched. In a specialist store they usually give you very good advice here.

For all types of yarn (cotton, silk, polyester, synthetic) the number determines the thickness of the thread. The higher the number, the finer the yarn. Be careful with 100% cotton yarns because there is a risk that they will shrink while washing. Synthetic sewing thread (100% polyester) is suitable for almost all types of fabric, even for elastic fabrics because it is lightly stretchable. It is best to go for branded yarn from eg Gütermann, because my experience is that cheaper yarns can break and fluff easier and that is not so good for the sewing machine.

  • Measuring material:
    • Tape measure : a tape measure is useful for measuring curved lines. This ruler is usually just as wide as the standard seam allowance (1.5 cm).
    • A sewing seam ruler: a 15 cm long seam ruler has a caliper that you can set at different distances. This is very useful for marking seams and hems and for measuring small dimensions precisely. There are also seam gauges without sliders. These are also useful for finishing seams and hems. Each side has a different seam value.
      The type of yarn that we choose depends on the fabric to be stitched!
  • Fabric marking tools:
    • ceramic lead pens (gives more precise lines) 
    • tailor’s chalk (you can wipe it off in no time). There is also a chalk pencil. I personally find this very useful. You can fill this with chalks in different colors so that you can apply the appropriate chalk color to any fabric color.
    • water soluble or disappearing ink pens: to apply markings to textiles, which gradually disappear afterwards. This pen looks like a felt-tip pen. With some markers they can be dusted off with a spray or water, or they disappear by allowing them to air dry. Be careful because if you iron over it, they may not go out. Test first for a piece of fabric.
    • Tracing wheel and carbon paper: to transfer markings from a paper pattern to your fabric. Note: they are not suitable for all types of fabric, because the markings do not always come out easily. So here too: best to test.
  • Material to draw or improve patterns:
    • Pattern paper: there is pattern paper with pre-printed squares of 4 by 4 cm, patterned paper per roll or in packets of a few sheets
    • Pencil and eraser
      A transparent ruler of 30 cm: to draw straight lines of patterns on paper and textile and to check dimensions. Ideal is the square, which has a right angle and a curve along which you can draw curved lines in your pattern.
      Indispensable: a pencil and an eraser to (re) draw patterns
  • Ironing equipment:
    • Iron: A steam iron is a fantastic help
    • Ironing board: you definitely need to iron
      sleeve board: for easy ironing of sleeves
    • Pressing cloth: take a cloth made of silk organza or nettle cloth so that you can see through it. It prevents the iron from scortching, melting or burning fine fabrics
    • Press pad: used to press the seams of collars and shoulders


  • Machines

A good sewing machine is of course indispensable for making your own clothing. And although in principle a machine that can make a straight and zigzag stitch is sufficient, modern machines offer countless possibilities. I personally have a very good experience with Janome. With regard to sewing machines, I will go into more detail in a subsequent blog post.
A lock machine is easy but not a must.
In my next post I will give you tips for the purchase of a first sewing machine, patterns and fabric.

Did you find this article useful? Give me a like!

HOTFIX

Bling ideas for clothes

Do you know that feeling: you want to make something special, that is not too much work but is great looking to show to everyone? Can you guess what I’m going to suggest? Need an extra tip? It looks a bit like diamond painting but gives much quicker results and you can use to shine … Yes, I’m going to help you with some bling ideas for clothes and other items.

How do you feel about pimping your wardrobe with rhinestones? Maybe you have a piece of clothing that looks pretty ordinary and that is why you no longer wear it. Perhaps your jeans, sneakers or pumps would look much nicer if rhinestones were applied to them.

In this blog post I will show you different bling ideas for clothes and a couple of ways to get started quickly to”bedazzle” (nice word, not?) shoes and clothing

Strass op kleding en schoenen
Werken met een hotfix applicator

CREATIVE BLING IDEAS WITH RHINESTONES: WHAT DO YOU NEED?

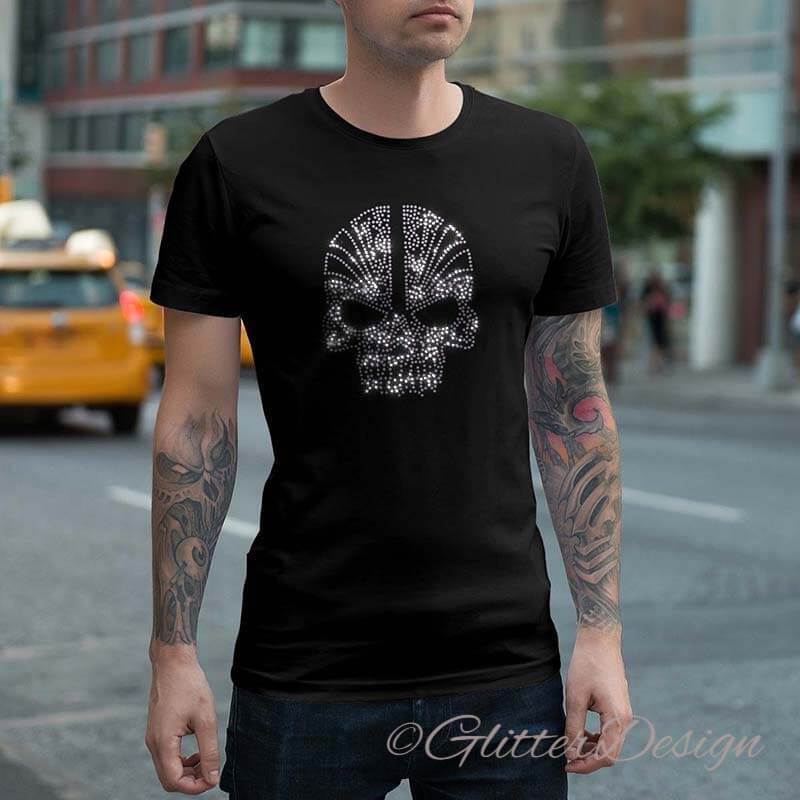
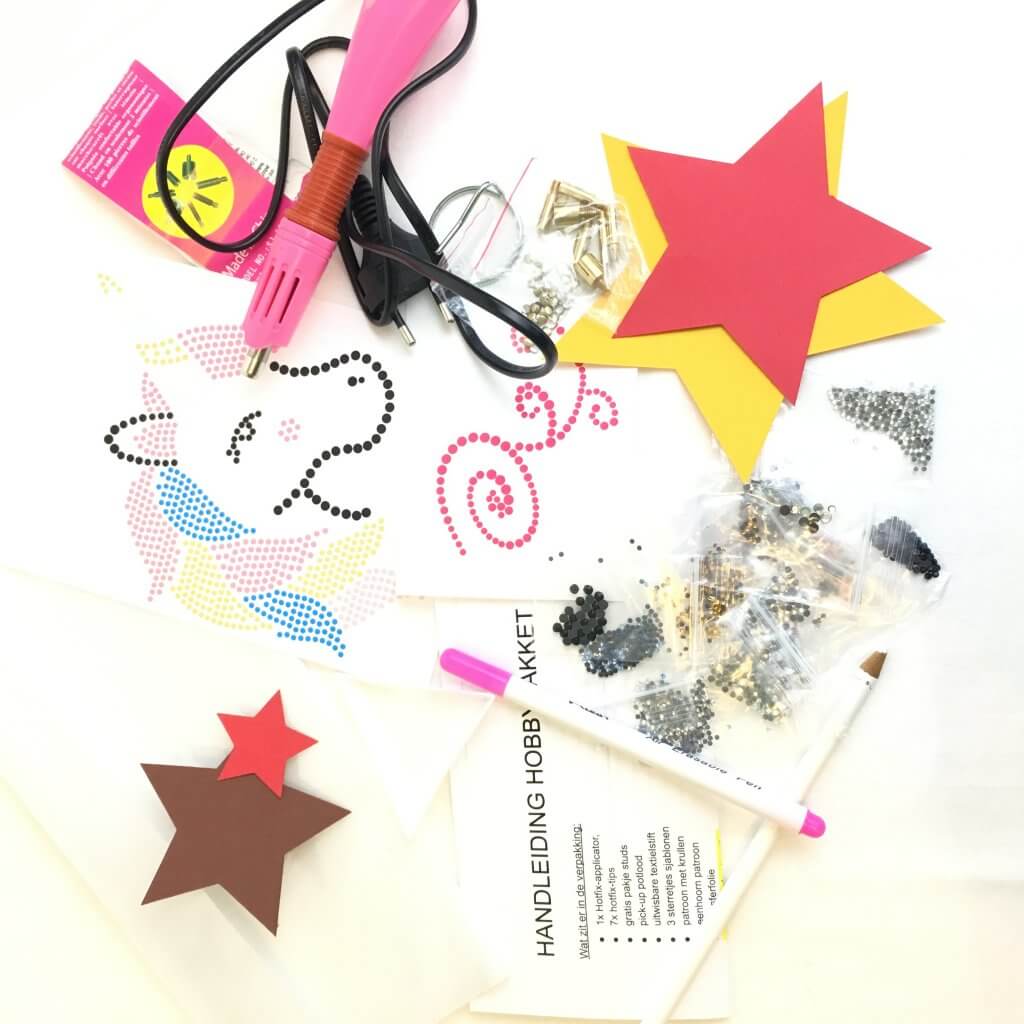
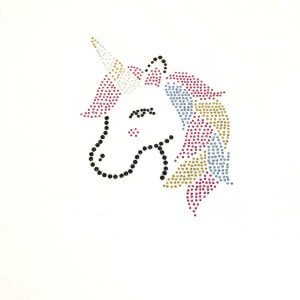
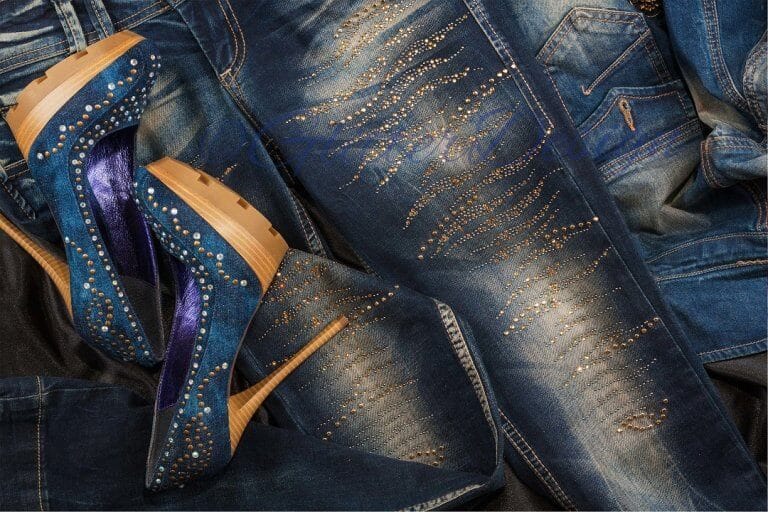
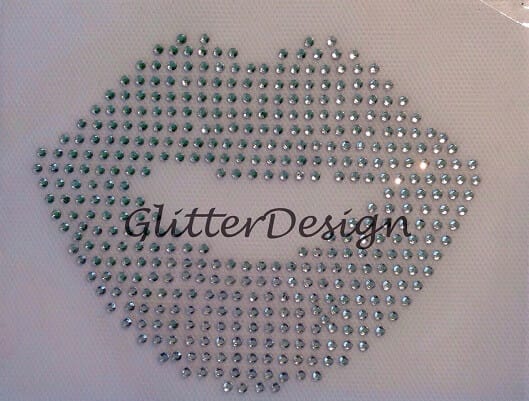
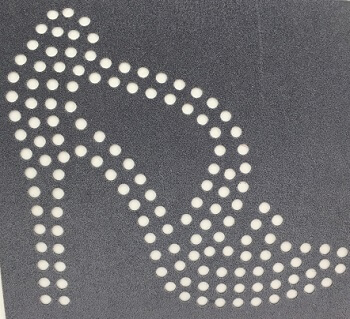
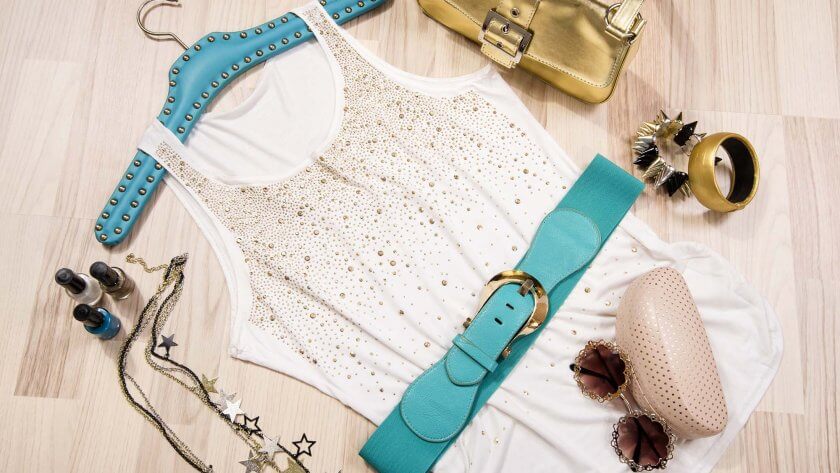
You probably already have a lot of creative ideas in mind, don’t you? To help you get started I have put together a hotfix craft ideas package that you can make yourself. This includes a hotfix applicator, rhinestones, a few patterns, erasable textile marker and transfer tape. A hotfix applicator is used to attach rhinestones to various materials. This do-it-yourself hotfix tool can create beautiful patterns, shapes and even lettering for your items, including clothing, purses, cell phones, belts, dolls, scrapbooks, shoes and accessories. With this set you can easily and quickly get started to bedazzle clothes or make something nice for yourself. Why not make a personalized gift for friends or family. You can also download patterns on the site, such as this skull pattern or angel wings.

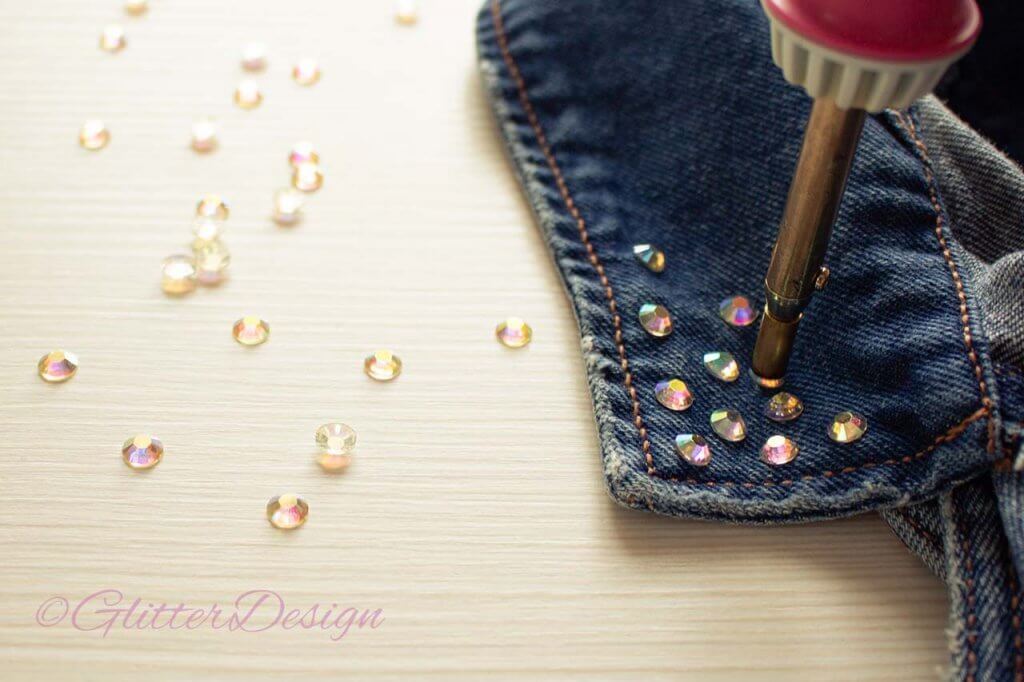
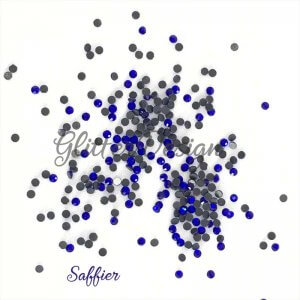
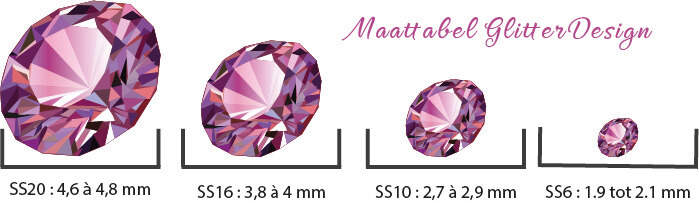
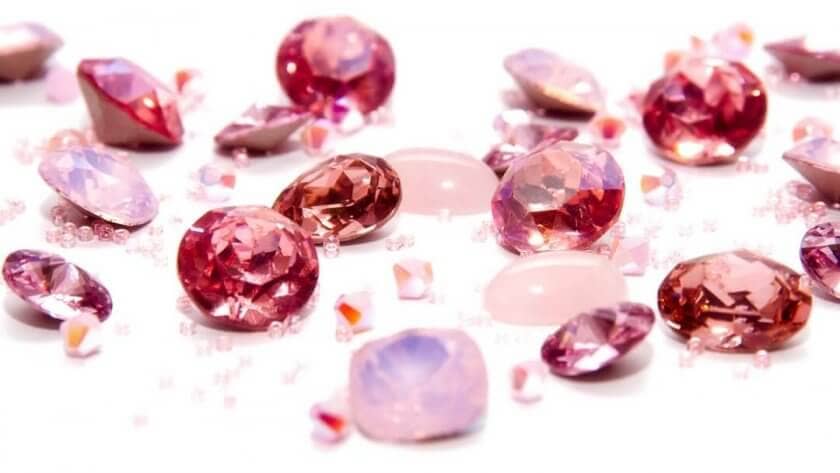
Rhinestones, or also called hotfix stones, are made of lead crystal glass that has been machined and polished for a high-quality finish. There is a layer of heat-sensitive glue on the back of the stones. This glue needs about 5 to 20 seconds to heat up and attach itself to a surface. However, to fully cure, you should count on 24 hours.

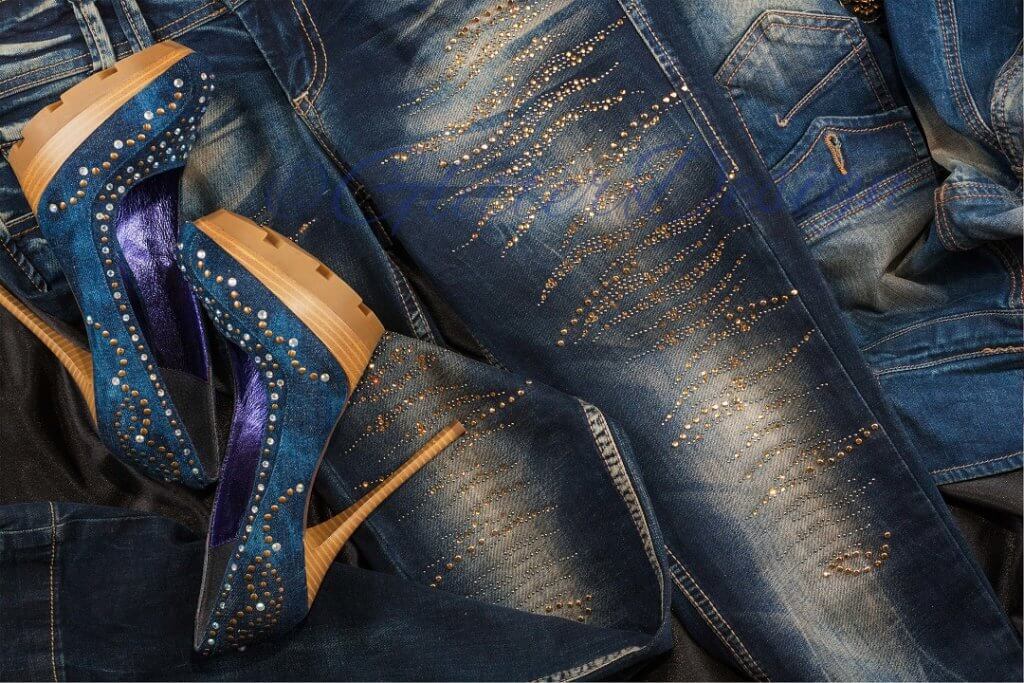
To achieve successful strong adhesion, the material must be able to absorb the adhesive when it is melted. Materials such as paper, card, wool, cotton, linen, viscose, tulle, denim, lycra, cotton jersey, silk, synthetic fabrics (polyester, etc.) and artificial fur are all suitable for applying hotfix stones. Less absorbent materials such as glass, plastic, smooth leather and fabrics with a wax coating are not suitable for absorbing the hotfix glue and therefore not for applying rhinestones.

A simple test to find out if a material is absorbent, is the water drop test. If you pour a little water over the surface and the water runs off the surface and is not absorbed into the material, it is not suitable for use with rhinestones. If the material in question contains a large amount of fabric softener, it may be necessary to wash before applying hotfix stones with a hotfix applicator or through other heat sources, such as an iron or heat press.

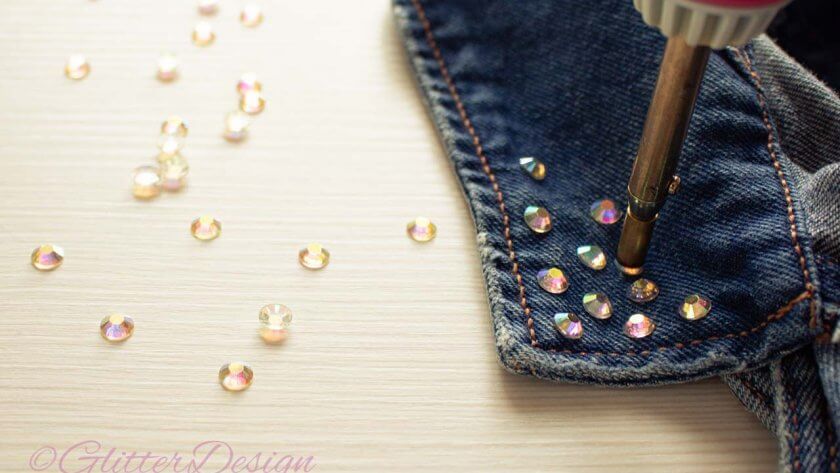
How cool is it to be able to make your own bling shirts. If you don’t feel confident enough applying it to your best dress at first, than practice first on an old jeans or something like that.

QUICK START GUIDE TO WORK WITH A HOTFIX APPLICATOR

  1. If it is the first time you use a hotfix applicator to work out your creative ideas with rhinestones, it is a good idea to first test it out on a piece of cardboard or residual material.
  2. It’s best to work on a solid surface, such as a table or work surface. Ironing boards are not suitable because they offer insufficient support.
  3. If you apply hotfix stones on fabric, make sure that the fabric is smooth. This means, it’s propably best to first iron your fabric.
  4. Draw a pattern on your chosen item with the erasable textile marker
  5. Important : when applying the rhinestones to thin and delicate fabric, place a piece of cardboard or baking paper between the layers of fabric to prevent the glue from seeping through and bonding all layers of fabric together.
  6. Before you switch on the device, choose the correct size of applicator tip for the rhinestone size that you are going to work with. You can find the sizes in the side of such a tip. The sizes are etched into it. You must have good eyes … or a magnifying glass can also help, of course. If you are not sure what the required size is, place the tip over the rhinestone. The right applicator tip, picks up the rhinestone. The tip of the applicator fits on the end of the hotfix applicator. Carefully screw in the applicator tip of the correct size.
  7. Pre-heat the Hotfix applicator for 2-3 minutes
  8. Place the stones on the fabric with the flat side down on the fabric
  9. Press the applicator on the stones and wait 5-8 seconds
  10. Place the applicator on the support stand to prevent things from being burned on the table
  11. Wait at least 5 minutes to change your hotfix tip
  12. Wait at least 24 hours to wash
Knutselideeënpakket met Hotfix

CREATIVE bling IDEAS WITH RHINESTONES, A CUT OUT DRAWING, ERASABLE TEXTILE MARKER AND HOTFIX APPLICATOR

Compose yourself a package with various sizes of cut out stars in cardboard. Place the star on your shirt, sneaker or mobile phone case, and draw the shape of the star with the erasable textile marker. Afterwards you can use the hotfix applicator to apply the chosen stones to the lines that you have just drawn. The lines of the erasable marker disappear automatically. In the video below I applied my creative ideas to some of my sneakers.

 Zelfklevende strass steentjes Saffier       Eenhoorn in strass steentjes

CREATIVE IDEAS WITH RHINESTONES, TEMPLATES AND TRANSFER TAPE

Below I give you a step-by-step guide for elaborating ideas with a dotted pattern. You can print the explanation below and put it next to you or just watch the videos in which I go through the different steps.

STEP-BY-STEP GUIDE TO WORK WITH TEMPLATES

Cut a piece of transfer foil about 3 cm larger in all 4 directions than the image will be (do not remove the background paper before cutting)

After the paper has been cut to the appropriate size, the back of the transfer paper (= the white back panel) may be removed. Keep this in a safe place and do not throw it away!

Attach this translucent transfer paper (with its sticky side up) to the corners with small pieces of tape on the work surface. This only serves that the whole can not shift during the laying of the stones. Also do not stick too tight, because then you may experience problems removing the transfer. Just lock the corners gently.

Place the hotfix rhinestones using tweezers or even easier with the supplied pickup pencil on the tape exactly where you want them. If the stone is not immediately put on the right spot, you can remove it and resubmit it as often as necessary to obtain the desired result.

The rhinestones are laid with their beautiful side down on the transfer foil

Arrange the glitter stones on the pattern.

When you are done, carefully remove the tape from the corners of the transfer tape and place the paper back (glossy side) back on the transfer tape. Make sure the stones do not move.

If you turn over your new transfer now, with the right side up, you see the end result. If this is what you are looking for, you are done with this transfer. If not, you can make changes at this time.

Once the transfer has been made, it can be applied to any fabric with an iron. Remove the back of the transfer, place the transfer on the garment exactly where you want it. (you will not get a second chance once heat has been applied, so take your time and place well). At this stage you can still reposition the transfer.

Afterwards we apply heat, to make the stones stick to the fabric and then you can not move them anymore.

After the adhesive has been applied, it can be washed in the machine, but is not recommended for dry cleaning because some of the chemicals used can denature the adhesive, causing it to discolor and become brittle or dissolve. Turn the fabric inside out and wash at no more than 30 ° C. Hang to dry.

I applied this rhinestone pattern to the back pocket of my jeans. This time I worked with Crystal colored rhinestones.

As you can see, it doesn’t have to be that difficult to get started. I hope i have I inspired you. And if I did please give me a like or if you have any question, don’t hesitate to reach out to me.

HOTFIX

What are rhinestone sizes?

Yes, there is actually a size chart to determine or measure the size of rhinestones. Rhinestones are sold per size, preceded or followed by an SS number (SS stands for Stone Size). There is no connection with millimeters in this number, in the sense that 6SS or SS6 stones are NOT 6 mm in diameter! But there is a size chart in which the dimensioning is explained, so that you can more easily figure out which size of rhinestones to choose.

So in general, the higher the SS number, the larger the diameter of the stone, and the more bling it will have. Conversely, the smaller the SS number, the smaller the diameter of the crystal and the more luster it will have.

SIZE CHART OF THE MOST COMMON USED RHINESTONES

Below you will find a list of the most popular and available hotfix or rhinestone formats, with their diameter in millimeters:

SS4: 1.5 – 1.6 mm

SS6: 1.9 – 2.1 mm

SS8: 2.3 – 2.5 mm

SS10: 2.7 – 2.9 mm

SS12: 3.0 – 3.2 mm

SS16: 3.8 – 4.0 mm

SS20: 4.6 – 4.8 mm

SS30: 6.3 – 6.5 mm

SS34: 7.1 – 7.3 mm

This chart will help you to determine which size you should choose for a T-shirt or shoes, flip flops or sandals, tights, body suits, belts, sweamwear, jeans of jean jacket or any other part of your outfit to pimp.

Strass Maattabel

Rhinestone size chart

Maattabel Strass Steentjes
HOTFIX

How to use a hotfix rhinestone applicator

WHAT IS A HOTFIX RHINESTONE APPLICATOR?

You can use hotfix applicator to attach hotfix stones to various materials. Hotfix stones, or also called rhinestones, are made of lead crystal glass that is mechanically grounded and polished for a high quality finish. There is a layer of heat-sensitive adhesive on the back of the stones. This adhesive needs about 20 seconds to heat and adhere to a surface. And the suitable tool for this is a hotfix applicator that will ensure that the adhesive will melt and the stones will stick to the desired surface. A rhinestone or hotfix applicator comes with multiple mouthpieces or parts for different sizes hotfix or rhinestones.

Is there a difference between rhinestones and hotfix stones?

The name rhinestone comes from the discovery of crystals that have been collected from the Rhine.

The popularity of stone crystals was initially limited because the crystals were only available at this location. An Alsatian jeweller, George Friedrich Strass, discovered a process for imitating diamonds by using metal powder to coat the bottom side of glass in 1775. The new process increased the complexity, brilliance and reflective properties of the glass. The popularity of the gemstone constantly increased and in the end the popularity spread throughout Europe. Hence the reference to rhinestones.

Hotfix stones are made of glass but in such a way that they give a nice shine so that they look like real gems. The front is facetted glass. And the more facets the glass has, the more shine it gets.

The back of hotfix stones should be mirrored with a silver coating to reflect light, just as mirrors should be coated with silver to reflect reflections. Without the coating, a flat back piece is no more than a piece of transparent glass of any shape that does not reflect light except for the surface.

The back has the colour grey or black, but if you look closely, dry adhesive has already been added to the dark, flat surface. Since there is already adhesive on the hotfix stones, you only need to apply heat to apply them to clothing. Both names are used interchangeably.

PREPARATION FOR USING THE HOTFIX APPLICATOR

WHAT DO YOU NEED?

  • It is best to work on a solid surface, such as a tabletop or a work surface. Ironing boards are not really suitable because they offer insufficient support. If you apply hotfix stones to fabric, make sure the fabric is smooth. If necessary, you can iron the fabric first.
  • You will also need tweezers with fine points.
  • When applying the rhinestones to thin and delicate fabric, it is best to place a piece of cardboard or a baking paper between the layers of fabric to prevent the adhesive from seeping through and adhering all layers of fabric to each other
  • Before you turn on the hotfix applicator, choose the correct size of applicator tip or mouthpiece for the rhinestone size you will be working with. The sizes are etched in the side of such a tip. If you are not sure what the required size is, place the tip over the rhinestone. The right mouthpiece takes up the rhinestone. The tip of the applicator fits on the end of the hotfix applicator. Gently screw in the correct size applicator tip.

WHAT MATERIAL IS SUITABLE?

In order to obtain a successful strong adhesion, the material must be able to absorb the adhesive when it is melted. Materials such as paper, card, wool, cotton, linen, viscose, tulle, denim, lycra, cotton jersey, silk, synthetic fabrics (polyester etc.) and artificial fur are all suitable for applying hotfix stones on. Less absorbent materials such as glass, plastic, smooth leather and fabrics with a wax coating are not suitable for absorbing the hotfix adhesive and therefore not suitable for applying rhinestones on. You can use the applicator to apply stones to different things such as T-shirts, sweaters, pants, dresses, handbags, shoes, bags, mobile phone covers, etc.


DETERMINE WHETHER YOUR FABRIC IS SUITABLE FOR THE HOTFIX APPLICATOR

In order to make a good adhesion of rhinestones possible, the material on which they are to be attached must be suitable. The adhesive of the hotfix stones melts by applying heat to it and it must be able to be absorbed by the substance to which they are applied. A simple test to find out if your material is absorbent is the water drop test. If the water runs off the surface, it is not suitable to use with hotfix stones. Or when dust has absorbed a large amount of fabric softener, it is best to first wash it.

THESE ARE THE STEPS FOR WORKING WITH THE HOTFIX APPLICATOR USING THE STANDARD ATTACHMENTS:

  1. Select the correct tip for the rhinestone format that you are setting…. all tips are clearly labelled with regard to size: 6SS, 10SS, 12SS, 16SS, 20SS and 30SS.
  2. Use the flat mouthpieces if you place stones with a flat top
  3. Insert the plug into the socket
  4. Allow the appliance to warm up for about 2 minutes … it is ready for use
  5. Pour out the stones. Place the garment on a heat-resistant surface, facing upwards where you want to apply stones. You can also place a protective piece of fabric between the front and back of your garment. This prevents the possibility that adhesive seeps through the top layer and leaves a spot on the other side
  6. First use the stones with their good side up and the adhesive side (grey) down! Push the right tip over the stone, hold it up, wait a minute and see if the adhesive melts (if it shines and small bubbles appear)
  7. As soon as the adhesive melts, push the stone gently on the fabric, do not use force and pull back your applicator … do NOT leave it on the stone … just push and pull away. The stone attaches itself to the fabric and pulls away from the hotfix applicator
  8. If you leave the tip of the applicator on the fabric too long, the adhesive will run off the stone, the stone will remain on the tip of the applicator and it will be difficult to straighten it…. just push down and back up. As simple as that
  9. Allow to cool down and test whether the stone remains firmly attached by rubbing over it.
  10. Take another stone and repeat the progress until you have all the stones in place
  11. Allow to cool and rub over the stones to see if they are all tightly attached.

In the video below I show you how to use a hotfix applicator to, for example, restyle your pants:

How to use a hotfix applicator

KIES HIER VOOR EEN VOORDELIG HOTFIX STARTERSPAKKET

Basic

Starter
21,95
  •  

pro

Super De Luxe
32,45
  •  
PopulaIr

A hotfix rhinestone applicator is delivered with multiple attachements or tips for different rhinestone sizes. You can use the bedazzler for all kinds of surfaces, like fabric, clothes, shoes, bags, jeans, sneakers, etc.

BEDAZZLE SHOES AND SNEAKERS

In case you are wondering if you can bedazzle hoes and sneakers YES we can. It’s really not that hard.  I’ll show you in my video.


THESE ARE THE STEPS FOR WORKING WITH THE HOTFIX APPLICATOR USING THE FLAT ATTACHMENTS:

  1. You may prefer to place the stone in the spot where you want to attach it and use the flat attachment.
  2. Lay the stone with the adhesive side down on your chosen surface
  3. Place the applicator gently on the stone and leave it there for about 10 seconds. Do NOT use force!
  4. Let it cool and check whether the stones are properly attached
  5. Repeat the process for all stones that are not properly attached


EXTRA ADVICE

  • Use the hotfix applicator with the correct attachment for the corresponding stones
  • If there is still a stone in your attachment, use the tweezers or a needle to push the stone off
  • Keep the tips clean with a small brush (the type you use to clean the grill)

OTHER METHODS FOR APPLYING RHINESTONES ON CLOTHING

panda stippelpatroon voor SS10 hotfix steentjes

RHINESTONE TEMPLATE

Choose a colour of rhinestones and rhinestone template

Strass applicatie

rhinestone transfer

Easy to iron on rhinestone templates

dansschoen in sticky flock template materiaal

rhinestone pattern

Bedazzling ideas

DETERMINE WHETHER YOUR FABRIC IS SUITABLE FOR THE HOTFIX APPLICATOR

In order to make a good adhesion of rhinestones possible, the material on which they are to be attached must be suitable. The adhesive of the hotfix stones melts by applying heat to it and it must be able to be absorbed by the substance to which they are applied. A simple test to find out if your material is absorbent is the water drop test. If the water runs off the surface, it is not suitable to use with hotfix stones. Or when dust has absorbed a large amount of fabric softener, it is best to first wash it.

IMPORTANT: WASHING INSTRUCTIONS

After the adhesive has been applied, it can be washed in the machine, but is not recommended for dry cleaning because some of the chemicals used can denature the adhesive, causing it to discolour and become brittle or dissolve. Turn the clothes inside out and wash at 30°C. Do not put clothes with rhinestones in a tumble dryer, but hang on a coat rack and allow it to dry by air.

CONCLUSION

Using a hotfix applicator is a quick way to quickly apply a number of stones to an item. You only need a basic hotfix starter package consisting of an applicator and stones and you can already get started to restyle your clothing. It also gives you great freedom in creativity. You put the stones on your chosen surface in a pattern that you have in your mind and you can start.

If you want to work more precisely, you can draw a pattern with pencil or tailors chalk in advance and then apply the hotfix stones.